

Guide to Shibori Dyeing
Shibori is an amazing technique used to tie die fabric and clothing, typically using indigo colored dye, to make intricate and beautiful patterns. I did some experimenting with a few different dyes, and tying techniques and cover it all here in this how to guide for DIY Shibori dyeing at home! Note: This post contains affiliate links which help me support the projects in this blog.
What is Shibori Dyeing
Shibori is a traditional Japanese dye technique that uses resist-dyeing to create unique, ornate designs on fabric. Resist-dyeing means the fabric is manipulated in a way to cover and conceal the fabric from being dyed in certain areas, which creates the beautiful patterns. The art of Shibori dyeing goes back hundreds of years in Japanese history, but is still practiced today. Typically, the dye used is a beautiful indigo color.
In this guide I’ll cover different wrapping methods with different materials types (that cause the resist-dyeing) and show you the finished results so you can determine what you like best! I also cover two types of dyes we used, where to find them, and how they each worked out.
Types of Indigo Dye
We used 2 different types of indigo dye.
- Rit All-Purpose Liquid Dye in Indigo Blue
- Indigo Dye Kit from Dharma Trading
TL;DR version: get the Indigo Dye Kit.
Rit All-Purpose Indigo Dye
The Rit dye was more of a navy blue color than indigo and wasn’t as rich. Also the process for this dye was to submerge the fabric for 30-60 minutes, rinse then dry. The coloring just wasn’t as intense with this dye, and overall it washed out more easily over time.
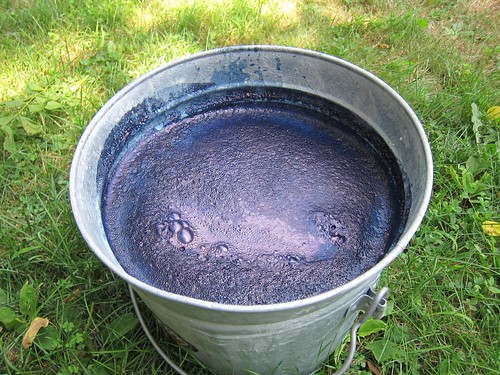
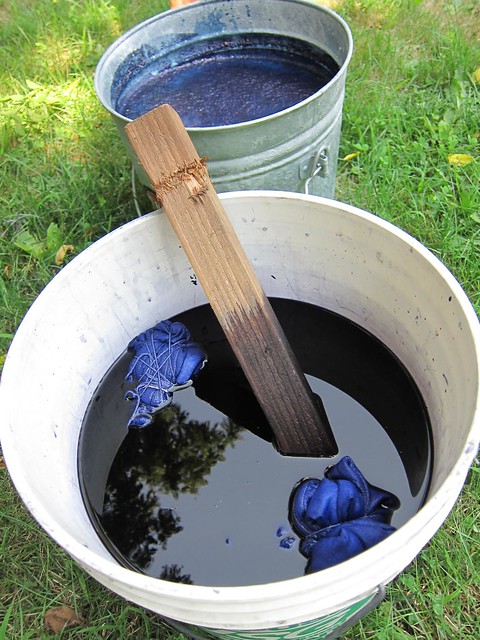
Indigo Dye Kit
The indigo dye kit uses a mixture of dye plus soda ash. Your dye is actually lime green (underneath the layer of bubbly blue in the photo) and you dip your fabric in for 1 minute. Your fabric actually turns lime green, and you remove it from the dye, open it up and let it oxidize in the air, which slowly gives your garment the lovely indigo color. It’s an amazing process and the color is intense and holds up well over washings.
How To Wrap Shibori Techniques
Now let’s get to the actual wrapping techniques we used! Some of these are traditional techniques and some we free-styled a little bit after we got the hang of what was going on. Here are our wrapping methods, and then what the outcome was after we dyed the fabric.
Arashi Shibori

Arashi Wrapping Method
The arashi technique is done by wrapping your fabric tightly around a stick or a pole, then wrapping string or rope on top of the fabric tightly.

Arashi: Outcome
The outcome produces a wispy etched print over solid stripes. It also produces an ombre or gradient effect — with the fabric closest to the stick being lighter in color than the fabric on the outside of the stick. For this shirt, I wrapped it horizontally so the top of the shirt is lightest. You could also wrap it vertically if you want your gradient to go from side to side. Either way — consider this before wrapping so you get the gradient going in the direction you want.
Itajime Shibori

Itajime Wrapping Method
The itajime shibori technique is done by folding your fabric up — for this style we folded it back and forth accordian-style. Then sandwich it between blocks of wood. Then tie it up with string to keep everything in place. We also free-styled this one a bit and added some clothespins to see what would happen!

Itajime Shibori: Outcome
The itajime results in these fantastic block shape patterns, with some unique patterns where you see more dye seeped in between the slats/folds in the fabric. Here are some variations to try on this method:
- make your accordion folds perfectly even to produce straighter and more uniform blocks on your fabric
- make your accordion folds sloppy to produce a pretty curved bamboo stick design
- skip the wooden slats in your fold, and your fabric will end up being dyed a lot more and your fabric will result in a darker print
- if you use the wooden blocks, you’ll have more white in your design
Kumo Shibori Method

Kumo Shibori Wrapping Method
The Kumo technique is to take small objects like rocks or pebbles and wrap thread or string around each pebble. We used something rubber bands to keep the rocks clumped together in place.

Kumo Shibori Results
The Kumo shibori pattern results in these cool circular patterns that are the closest to American tie-dye patterns, but still distinct and beautiful.
Freestyle Accordion Method

Accordion-Style Shibori Wrapping Method
So this is where we started to get creative. After seeing how this was starting to work, we started making up on our own Shibori how to techniques, using variations on the traditional methods. For this one, I folded a shirt with an accordion-fold, starting in the bottom corner and working my way diagonally up the the opposite top shoulder of the shirt. Then tied it up with strings to secure it.

Accordion-Wrap Results
The result was this diagonal pattern where lots of dye seeped in between the accordion folds, but stayed out of the tighter folds. This produced a deep contrast between the 2 areas. This one would be cool to do non-diagonally as well to get vertical or horizontal stripes.
Freestyle Flag Fold

Flag Fold Method
Another totally made-up shibori method! (This is fun.) We wrapped the fabric up like you would fold a flag, then we tied strings around the 3 corners. (I didn’t take a photo of the ‘before’ so you’ll have to imagine what it looks like with this actual folded flag photo.)

Flag Fold Results
This one turned out circular! And similar to the kumo method, which isn’t what I would have expected. But it’s fun to experiment and play around.
What I Learned from DIY Shibori Dyeing
Through this process of learning shibori how to techniques, I loved the seeing how dyed garments come to life. I love all of the techniques and the different results they produce. After all of the techniques we experimented with, the best technique for getting even color and producing the best effects was folding accordion-style. Experimenting with different variations of the accordion-fold (with wooden blocks, slats, neat folds, messy folds, etc) was fun to see what kinds of tie dye results we could get. I highly recommend doing your own Shibori dyeing at home!
And after you dye your fabric, if you need ideas of what to make out of your fabric, it would be super cool to make a shibori dyed bow tie or detachable collar!
Source: House Beautiful: The Art of Shibori, a Traditional Japanese Dye Technique
Never miss a sewing project or tutorial
Want to get my best crafty tips & tutorials to create handmade projects and heart-melting gifts? All delivered to you in a weekly-ish email, along with exclusive offers. Pop your email in the box below and hit Subscribe. Unsubscribe anytime. See my Privacy Policy for details.
Oh! And, you’ll also get 10% off your next pattern purchase.